













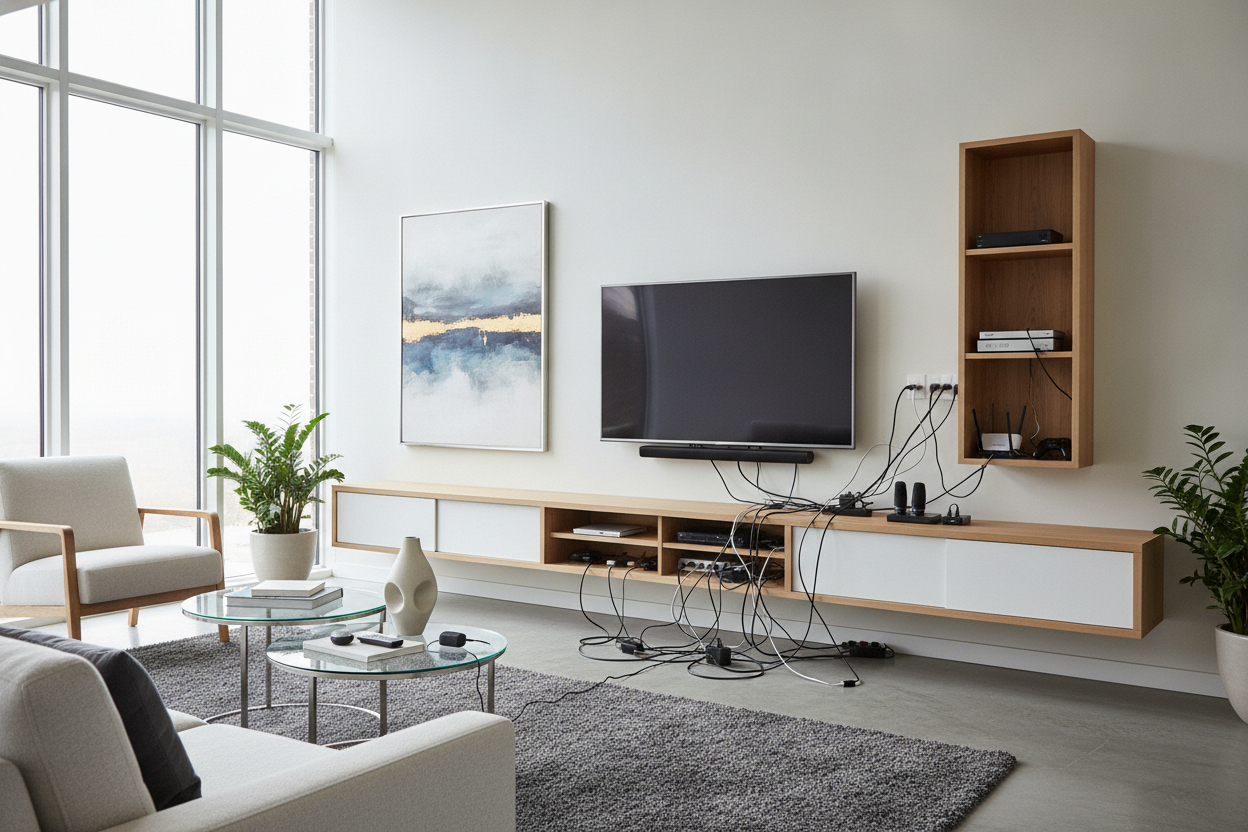
I spent three hours last Saturday staring at a tangle of black rubber snakes behind my TV. I had just finished mounting a gorgeous floating entertainment stand, thinking I had finally achieved that minimalist, airy vibe I saw in a magazine. Instead, I had a sleek walnut shelf with a waterfall of HDMI cables and power cords ruining the entire visual profile.
We have all been there—tricked by the professional staging of a furniture catalog. The reality of a wall-mounted setup is that it requires about 20% furniture assembly and 80% cable management strategy. If you are not prepared to deal with the logistics of what happens behind the drywall, that floating unit is going to look like a temporary DIY project rather than a high-end design choice.
Quick Takeaways
- Wall-mounting is a commitment: you need a stud finder and a level, not just a screwdriver.
- Cables must be routed through the wall or hidden in paintable raceways to maintain the 'floating' illusion.
- Internal depth is a trap: check if your bulky router or gaming console will actually fit inside.
- Always mount into studs; drywall anchors are a recipe for a shattered TV and a hole in your wall.
The Myth of the Effortless Floating Modern Entertainment Center
The dream of a floating modern entertainment center is rooted in those impossible photos where a TV hovers over a clean wooden box with zero wires in sight. It looks sophisticated and makes the room feel twice as large. However, unlike a mid-century modern entertainment center where you can easily hide a power strip behind a solid tapered leg, a wall-mounted unit leaves the floor beneath it completely exposed.
I learned this the hard way when I realized my power outlet was six inches below where I wanted to mount the unit. I ended up with a gorgeous piece of furniture that looked like it was being held up by a single thick white cord. Marketing photos are a lie—they never show the power brick for the soundbar or the messy coaxial cable for the internet. If you want that clean look, you have to plan for the 'invisible' parts first.
If You Don't Hide the Cords, It Just Looks Like a Mistake
A wall entertainment center floating six inches off the floor is meant to create a sense of weightlessness. But the moment you have a cluster of grey and black wires dangling down, the aesthetic shifts from 'architectural' to 'unfinished basement.' It breaks the continuous line of the flooring, which is the whole reason people buy these units in the first place.
I have seen $2,000 custom units ruined by a $5 power cord. It is a visual weight that drags the eye down to the floor. If you are not ready to commit to a cable management system, you are better off sticking with a traditional floor-standing console. Minimalist design is only 'minimal' if the clutter is actually gone, not just hanging out in the open.
In-Wall Routing vs. Paintable Raceways
If you own your home, buy an in-wall cable routing kit. It involves cutting two holes in your drywall—one behind the TV and one behind the stand—and feeding the wires through. It sounds terrifying, but it is a thirty-minute job that changes everything. If you are a renter, your savior is the paintable raceway. Buy the rigid plastic ones, sand them slightly, and paint them the exact color of your wall. It is not perfect, but it is 100% better than the 'spaghetti' look.
Picking a Floating Wall Mount Entertainment Center That Fits Your Router
One thing I wish I’d checked before clicking 'buy' on my last unit was the internal depth. Many of these pieces are surprisingly shallow—sometimes only 10 or 12 inches deep. My mesh router sat on top of the unit for three months because it was too tall to fit inside the cabinets. When you choose a floating TV stand entertainment center, you are trading the convenience of floor space for a much stricter storage capacity.
Look for a floating wall mount entertainment center with drop-down doors or flip-up hinges. These are much easier to access when the unit is mounted at waist height. Also, ensure there are pre-drilled grommets in the top and bottom of the internal shelves. I once had to take a hole saw to a brand-new MDF unit because the manufacturer forgot that electronics actually need to connect to each other. It was messy, and the laminate chipped instantly.
The Final Look: A Floating TV Media Center That Actually Looks Custom
When you finally get it right—the studs are found, the cables are fished through the wall, and the unit is perfectly level—the result is incredibly satisfying. A floating tv media center changes the entire energy of a living room. It makes the space feel modern and custom-built, even if the unit itself came in a flat-pack box from a big-box retailer.
My personal mistake was trying to do it alone. These units are heavy, and trying to hold a 60-inch cabinet against a wall with one hand while driving a lag bolt with the other is a recipe for a trip to the urgent care. Get a friend, buy a decent level, and spend the extra $20 on a cable management kit. Your living room deserves better than a waterfall of wires.
FAQ
Can I mount a floating stand on a plaster wall?
You can, but you need to be extremely careful. Standard drywall anchors won't work. You must find the lath and studs or use heavy-duty toggle bolts, but even then, I would be wary of putting a heavy TV on top of the unit.
How high should I mount my floating entertainment stand?
Generally, you want the bottom of the unit to sit between 8 and 12 inches off the floor. This provides enough clearance for a robot vacuum and maintains that 'floating' look without making the TV sit too high for comfortable viewing.
Do I need a special drill for mounting?
A standard power drill is fine, but you will need a set of high-quality wood bits for the studs. If you are mounting into brick or concrete, you will absolutely need a masonry bit and a hammer drill.

Leave a comment
This site is protected by hCaptcha and the hCaptcha Privacy Policy and Terms of Service apply.