


There is a distinct tension between a chaotic workspace and a productive mind. As a designer, I often walk into home offices where the furniture is exquisite, but the desktop surface is a disaster of loose papers and scattered pens. The standard, store-bought solutions often fail because they aren't tailored to your specific workflow or aesthetic. Learning how to make an organizer is not just a craft project; it is an exercise in spatial planning and ergonomics. By building your own, you bridge the gap between pure utility and bespoke design, ensuring every inch of your desk serves a purpose.
Key Considerations Before Fabrication
- Structural Integrity: Determine if the unit needs to hold heavy textbooks or lightweight diy office supplies. This dictates material thickness.
- Ergonomics & Reach: The organizer should sit within your primary reach zone (approx. 14-16 inches) to prevent repetitive strain.
- Aesthetic Cohesion: The finish should complement your desk's surface—matte textures for modern spaces, wood grains for traditional setups.
- Modularity: Consider a design that allows for future expansion, such as a stackable diy desktop shelf organizer.
Selecting the Right Material Palette
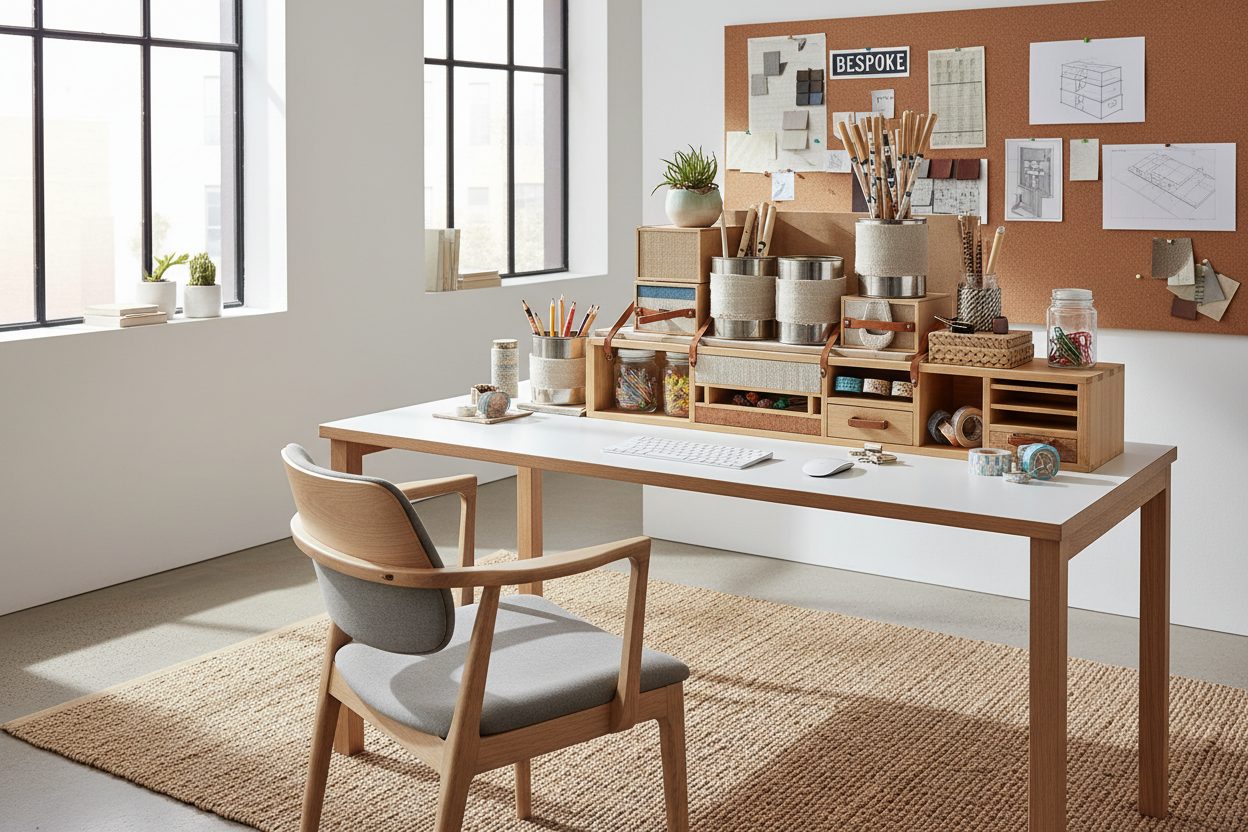
The foundation of any homemade desk organizer is the material. While many gravitate toward a diy desk organizer cardboard easy tutorial, as a specialist, I advise looking at the longevity of the structure. High-density cardboard is surprisingly durable if reinforced properly, making it an excellent substrate for wrapping in linen or textured wallpaper. This technique allows you to create a cute desk organizer diy that mimics high-end fabric-wrapped boxes found in luxury boutiques.
For a more industrial or rustic look, consider an upcycled desk organizer using reclaimed wood or repurposed tin. The juxtaposition of raw materials against sleek technology creates a sophisticated visual balance.
Zoning and Layout Strategy
Effective organization is about categorization. Do not simply build a box; design a workflow. Your design should likely include three distinct zones:
1. The Document Zone
Paper clutter is the primary offender in office design. A diy desk file organizer or a vertical diy file sorter is essential here. When constructing a diy file holder for desk use, ensure the dividers are spaced at least 2 inches apart to prevent overstuffing. I recommend angled dividers, which allow for easier visibility of tabs compared to standard horizontal slots.
2. The Stationery Station
Small items require containment to prevent visual noise. A diy desk caddy or stationery organizer diy should feature shallow compartments. If you are creating a diy desk organizer tray for a drawer, measure the depth precisely to ensure the drawer closes flush. For desktop units, consider tiered levels—placing shorter items like clips in front and taller items like scissors in the back.
3. The Shelf and Display
A diy desktop shelf organizer adds verticality, which saves precious footprint on the desk surface. This is ideal for a diy office desk organizer where you might want to display a small succulent or a framed photo alongside your tools, blending function with personality.
Structural Assembly and Finishing
Whether you are building a complex diy document organizer or a simple diy paper holder for desk, the joinery matters. If working with cardboard or foam core, use a fast-setting, high-viscosity glue to prevent warping. For an easy diy desk organizer made of wood, internal bracing is key. Always sand rough edges; nothing ruins the tactile experience of a workspace faster than a splinter or a sharp paper edge.
Finally, consider the base. I always recommend adding a felt or cork bottom to your table organizer diy project. This protects the finish of your desk and prevents the unit from sliding around when you pull out a file.
My Personal Take on how to make an organizer
I learned a hard lesson about weight distribution early in my career while mocking up a custom solution for a client. I designed a beautiful, wide-span diy office supply organizer intended to sit on a floating shelf. I used a medium-weight cardstock core, wrapped in a stunning grasscloth wallpaper. It looked architectural and pristine.
However, I failed to account for the "lean" factor. The client loaded the diy desktop file organizer section with heavy glossy catalogs. Within two weeks, the vertical dividers began to bow outward, and the bottom shelf sagged in the center, ruining the clean lines we had worked so hard to achieve. The lesson? Always over-engineer the base and vertical supports. Now, even when I make a prototype diy desk organizer cardboard easy style, I laminate two sheets together for the load-bearing walls. It adds millimeters to the thickness but years to the lifespan.
Conclusion
Creating a bespoke organizer is more than a weekend project; it is a commitment to a better working environment. By selecting quality materials and planning for your specific needs, you move beyond a simple how to make a desktop organizer tutorial and into the realm of custom furniture design. Your workspace deserves that level of attention.
Frequently Asked Questions
How do I ensure my cardboard organizer is durable enough for daily use?
To elevate a standard cardboard project, use the "lamination" method. Glue multiple layers of corrugated cardboard together with the grain running in alternating directions (cross-graining). This mimics plywood and significantly increases rigidity for your diy file sorter.
What are the ideal dimensions for a desktop file organizer?
Standard letter paper is 8.5 x 11 inches. Your diy document organizer should have internal dimensions of at least 9.5 x 12 inches to allow for easy retrieval and folder tabs. For depth, 10 to 12 inches is standard for desktop stability.
How can I make a DIY organizer look expensive?
Texture and edges are the secrets. Wrap your diy desk caddy in high-quality contact paper, linen fabric, or leather scraps. Pay special attention to corners; mitered corners or neatly folded edges hide the raw material underneath, giving it a manufactured, high-end appearance.
Leave a comment
This site is protected by hCaptcha and the hCaptcha Privacy Policy and Terms of Service apply.